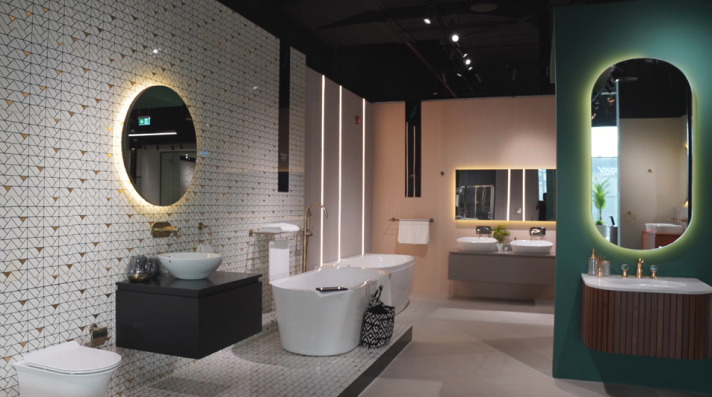
When it comes to bathroom design, lighting plays a critical role in creating a functional and relaxing environment. Given the high levels of moisture and humidity, installing waterproof bathroom lights is essential for safety and longevity. This comprehensive guide will walk you through the process of installing waterproof bathroom lights, ensuring you achieve the perfect blend of style, safety, and functionality in your bathroom. Whether you’re a DIY enthusiast or someone planning to hire a professional, this guide will provide you with valuable insights and practical steps to illuminate your bathroom the right way.
Understanding Waterproof Bathroom Lights

Credits: Canva
What Are Waterproof Bathroom Lights?
Waterproof bathroom lights are specifically designed to withstand the high levels of moisture and humidity commonly found in bathrooms. These lights are built with materials and seals that prevent water from penetrating and damaging the electrical components. They come in various forms, including ceiling lights, wall lights, and shower lights, each designed for different areas of the bathroom.
Importance of Waterproof Bathroom Lights
The primary reason for installing waterproof lights in your bathroom is safety. Water and electricity are a dangerous combination, and the use of non-waterproof lights can lead to electrical shocks, short circuits, or even fires. Additionally, waterproof lights are more durable and require less maintenance, making them a cost-effective solution in the long run.
Types of Waterproof Bathroom Lights
- Ceiling Lights: These are ideal for general illumination and are often installed in the center of the bathroom. They provide bright, even lighting and are available in various designs, from flush mounts to recessed lights.
- Wall Lights: Often used for task lighting around mirrors, wall lights help reduce shadows on your face, making them perfect for grooming tasks.
- Shower Lights: Specifically designed for wet zones, these lights are highly water-resistant and provide focused lighting in the shower area.
Planning Your Bathroom Lighting Layout

Credits: Canva
Assessing the Bathroom Zones
Before you start installing lights, it’s crucial to understand the different zones in your bathroom:
- Zone 0: This is the area inside the bath or shower tray. Any light fitting used here must be low voltage (12V max) and have a minimum rating of IP67, meaning it is fully submersible in water.
- Zone 1: The area directly above the bath or shower to a height of 2.25m from the floor. A minimum rating of IP44 is required here, indicating protection against splashing water.
- Zone 2: The area stretching 0.6m outside the perimeter of the bath and 2.25m above the floor. An IP rating of at least IP44 is recommended for fittings in this zone.
- Outside Zones: Areas not covered by the above zones. No special IP rating is required unless the light is exposed to splashes.
Choosing the Right Lights for Each Zone
Each zone in your bathroom requires lights with specific IP ratings to ensure they are safe and effective. Here’s a quick guide:
- Zone 0: Use fully submersible lights with an IP67 rating.
- Zone 1: Install lights with a minimum of IP44, such as downlights or shower lights.
- Zone 2: Opt for IP44-rated lights, including wall lights or ceiling lights.
- Outside Zones: Standard lights with no special IP rating can be used here.
Determining the Quantity and Placement of Lights
The number of lights you need depends on the size of your bathroom and the desired brightness level. For a small bathroom, a single ceiling light may suffice, while larger bathrooms may require a combination of ceiling, wall, and shower lights. Ensure that the lights are evenly spaced to avoid dark spots and shadows.
Tools and Materials Needed for Installation

Credits: Canva
Tools Required
- Screwdriver
- Drill with appropriate bits
- Voltage tester
- Wire stripper
- Ladder
- Measuring tape
Materials Required
- Waterproof bathroom lights
- Electrical wiring
- Junction boxes
- Cable connectors
- Mounting brackets
- Insulation tape
Step-by-Step Guide to Installing Waterproof Bathroom Lights

Credits: Canva
Step 1: Turn Off the Power
Safety should always be your top priority when working with electricity. Before you begin the installation, turn off the power to the bathroom from the main circuit breaker. Use a voltage tester to ensure that the power is off.
Step 2: Plan the Wiring Layout
Plan the wiring layout according to your lighting design. Ensure that the wiring is routed in such a way that it remains hidden and doesn’t interfere with other bathroom fixtures. Mark the spots where you will install the lights and junction boxes.
Step 3: Install the Junction Boxes
Junction boxes are essential for connecting multiple wires securely. Drill holes in the marked spots and install the junction boxes. Ensure that the boxes are rated for bathroom use and are properly sealed to prevent moisture ingress.
Step 4: Run the Electrical Wires
Run the electrical wires from the main power source to the junction boxes and then to the light fixtures. Use cable connectors to secure the wires inside the junction boxes. Ensure that the wires are properly insulated and there are no exposed metal parts.
Step 5: Mount the Light Fixtures

Credits: Canva
Mount the waterproof light fixtures according to the manufacturer’s instructions. Ensure that the fixtures are securely attached to the ceiling or wall and that the seals are intact. For ceiling lights, use a ladder to reach the mounting spot, and for wall lights, ensure that they are at the correct height for optimal illumination.
Step 6: Connect the Wires
Connect the electrical wires from the junction boxes to the light fixtures. Match the live, neutral, and earth wires correctly and secure them with wire nuts. Double-check the connections to ensure they are tight and safe.
Step 7: Install the Bulbs and Test the Lights
Install the appropriate bulbs in the fixtures and turn the power back on at the circuit breaker. Test the lights to ensure they are working correctly. If any light doesn’t turn on, check the wiring connections and fix any issues.
Step 8: Seal and Protect the Fixtures
To ensure the longevity of your waterproof lights, it’s crucial to properly seal the fixtures. Use insulation tape or sealant around the edges of the fixtures to prevent moisture from entering. Check the IP rating on the light fixtures to ensure they are suitable for the location in the bathroom.
Common Mistakes to Avoid

Credits: Canva
Incorrect IP Rating Selection
Choosing the wrong IP rating for your bathroom lights can compromise safety. Always check the IP rating of the lights and ensure they are appropriate for the zone they are being installed in.
Poor Wiring Connections
Loose or improper wiring connections can lead to electrical hazards. Double-check all connections and make sure they are secure before turning the power back on.
Skipping the Junction Box
Some DIYers might be tempted to skip installing junction boxes to save time, but this is a critical mistake. Junction boxes protect wiring connections and prevent electrical fires, so they should never be omitted.
Tips for Maintaining Waterproof Bathroom Lights

Credits: Canva
Regular Cleaning
Regularly clean the light fixtures to remove dust and moisture buildup. Use a soft, dry cloth to wipe the fixtures and avoid using water or cleaning agents that can damage the waterproof seals.
Check for Wear and Tear
Periodically inspect the light fixtures for signs of wear and tear. Look for cracks, corrosion, or any signs that water may be entering the fixture. Replace any damaged components immediately to maintain safety.
Replace Bulbs Promptly
If a bulb burns out, replace it promptly to avoid overloading the other bulbs and to maintain consistent lighting in your bathroom. Ensure the replacement bulbs have the correct wattage and are compatible with the fixture.
The Importance of Professional Installation
While installing waterproof bathroom lights can be a rewarding DIY project, there are situations where professional installation is advisable. If you are unsure about any part of the installation process or if your bathroom has complex wiring, hiring a licensed electrician is the best option. Professional electricians have the expertise to ensure the job is done safely and to code, providing peace of mind.
Conclusion
Installing waterproof bathroom lights is a crucial step in creating a safe and inviting bathroom environment. By following this comprehensive guide, you can ensure that your bathroom is not only beautifully lit but also protected against the hazards of moisture and electricity. Whether you choose to do it yourself or hire a professional, the result will be a well-lit bathroom that enhances your daily routine.
Jaquar’s Lighting Solutions for Your Bathroom

Credits: Jaquar
When it comes to choosing the right lighting solutions for your bathroom, Jaquar offers a wide range of waterproof lighting options that combine functionality with elegance. Whether you need architectural facade lighting to make a statement, commercial outdoor lighting to enhance safety, or smart lighting solutions that bring your bathroom into the future, Jaquar has you covered.
Why Choose Jaquar?
Jaquar is India’s leading lighting manufacturer, known for its commitment to quality and innovation. With Jaquar’s waterproof bathroom lights, you can enjoy peace of mind knowing that your bathroom is equipped with lights designed to withstand the challenges of a moisture-rich environment. From energy-efficient LED lights to smart lighting solutions that adjust to your needs, Jaquar provides the perfect blend of style, safety, and sustainability.
Are you ready to elevate your bathroom with Jaquar’s waterproof lighting solutions? Explore our extensive range of products today and experience the difference that quality lighting can make in your home.


